Thursday, September 11, 2014

how to image transfer DIY

On my DIY hunt to find a way to "screen print" on a tshirt, I came across a ton of DIY blogs that claimed to have the "easiest" or the "best results". I tried about 3 different types. Its not that they didn't work, I just wanted something with a better quality. Some came out smudgy, if tha'ts even a word (don't judge!), and other stiff. I didn't want to go out and buy a ton of screen printing materials just for one design either. So I finally decided I was going to give it one last try using lacquer thinner.
The tutorial I found here said to use paint thinner. I tried that, it DID NOT work! A lot of other commenter's pointed out the same thing. One comment has said lacquer thinner worked, so the second time I made the trip to Home Depot, I grabbed some lacquer thinner.
At this point, I just had my fingers crossed. I had tried other ways and they didn't work, so this was kind of my last ditch effort before throwing my hands up and ordering a screen printing kit!

Things you will need;

- Lacquer Thinner
- Spoon (Or something to rub the design onto the fabric or t-shirt)
- Q-tip
- T-shirt or fabric
- Tape
- Laser print of image you want to transfer REVERSED! (It MUST be laser, inkjet will smudge.)

Grab your design. Create it in photoshop, or whatever program you have. Remember it will be in black and white! Then you need to reverse the image, so it looks mirrored. Print your design out.
(I am told you can also print this out on a copy machine as it uses the same ink but I have not tested this out!!!)
You can also grab one of my designs HERE or HERE. They are for personal use ONLY. Please do not redistribute elsewhere or use to products to sell!

Once you have it printed out, and this is optional, cut off any success from the edges and use tape to hold it down on your t-shirt. I didn't use tape to hold it down the first time, and it turned out fine, but this helps your fingers so you don't have to hold it so tight!

The lacquer thinner has a very strong odor, and is toxic, so I just had the jug beside me and as soon as I dipped the q-tip into the paint thinner I immediately put the lid back on to reduce the fumes!
You also need to work quick with lacquer thinner, it dries fast!
Then I rubbed the lacquer on the print, only in small patches. At first I tried 3-4 letters at a time, but it was drying to fast and I couldn't rub it quick enough, so stick with small patches. Trust me! 
The rubbing part reminded me of those transfer things my parents bought me as a kid. It came with a little plastic tool to rub the image off onto something else. Does anyone remember those? Do they even make those anymore?! Ok, back to the transfer...
Then I took my spoon and rubbed the back of it against the print to burnish it on to the fabric. I worked at little at a time, lacquer then rubbed, until I had the finished the whole design! Some parts came off darker and cleaner than others, I think that was just how fast I could apply the lacquer and rub it. That and my printer needs more ink...
And this is what it turned out like!


Now I'm told it doesn't wash off. I haven't tested that yet. So when I do, I will update with more photos to test the durability!
The other thing I love about this process over the paint or the image transfers you buy, is that it has clean lines and it is not stiff at all. The design is as soft as the t-shirt itself.
And if you attempt this, I would LOVE to see how yours turned out!
Happy Thursday :)


Friday, August 1, 2014

DIY Screen Printing on Tshirts

It's been done, probably 100 times over. But I think I may have found one of the most inexpensive and easiest ways to get er' done!
It all started when I jumped onto Instagram and notices all these adorable screen printed shirts. I fell in love! But at $20-35 each, x2 (remember, I have twins so its double everything!) It adds up FAST! We are always on a budget. And as much as I would love to just go buy every cute thing I lay my eyes upon and support some wonderful wham's, I cannot justify it!
SO, I decided to attempt this whole screen printing thing on my own.
Materials;

- 1 embroidery hoop (I found mine at a thrift store but Im sure you can find them at your local craft store!) Mine was $1
- Leotards/Nylons (Dollarama) $1.25
- Fabric Paint (I just purchased martha stewarts stuff but its leaves it stiff) $2,88 at Walmart
- T-shirt $1.25 - $2.00
- Printer + Design
- Something to cut design out (Those pen slicer things and rubber sheets are the BEST way to do this!)
- Thin plastic (I used paper, big NO NO! It bled through, so something very thing and plastic would work well!)
- Old card
TOTAL COST = UNDER $10 (I had some things on hand!)

I started by creating my design on my computer in photoshop. Then I printed it off. This is where you would need to lay it overtop of your plastic sheeting and use one of those slicing pens (make sure to have that rubber pad on the underside so you don't slice your table!) and slice out the pieces. I used paper, which didn't work so well.  I highly suggest using plastic!

I took my embroidery hoop, and stretched the leotards/nylons over it and held it into place. I stretched it a bit, but not too much and it didn't shift at all!

Then I laid the cut out on top of the shirt, and on top of that I laid the embroidery screen. This is the fun part...
I took out my paint and laid a generous amount of paint at the top of the design, NOT on the design! Then I took my old card and slide it across from top to bottom. Surprisingly, this worked amazing! minus the bleeding...


Next time I will use some plastic sheets to do my cut outs, that way you can re-use the design again. The other way I found online to create a screen print was to use mod lodge. I didn't like this idea because it would cause me to have to purchase multiple hoops or have to re-do the design again. (I imagine pulling off the nylon would make it impossible to put it back onto the hoop!)

I also would suggest purchasing some REAL fabric paint. The stuff I bought said it would be used for fabric, but it is quite stiff. It was only $2.88 though and I am sure I will get 5 + shirts out of the bottle...

I am going to attempt this again, REALY soon. I have a ton of shirts that I want done before the boys start kindergarten which is approaching way too fast!
Have you ever done any DIY screen printing? Would love to see how it turned out!

Sunday, June 1, 2014

Kid Friendly Strawberry Daiquiri Recipe

First off, did you know how easy it is to create a homemade slushy in your own home?! And second, did you know that it can be super easy, quick and not a whole heck of a lot of work in the process! (My kind of drink!) I did, only cause I just tried it because I had very little energy to run down to the corner stone and my boys were asking for a cold drink. I am not super mom here! Just a regular joe jane trying to live a happy healthy life!

Okay, so to the recipe.


Kid Friendly Strawberry Daiquiri Recipe + FAIL!

- Motts Strawberry Daiquiri Mix (Or other. Juice can work too, specially great for lemonade slushy!)
- Water (if you are using motts, its strong stuff.)
- Lots and LOTS of ice cubes.
- Blender


Put all the ice cubes into your blender. I didn't have enough this time around cause for some strange reason someone forgot to fill the ice cube tray :/
I suggest using the WHOLE thing, if not 2 or 3!
Add in your motts syrup (bout 1/4 cup if making a whole blender full) and add a bit of water.
Hit that blender up and wait till its all slushy!


So today mine was a fail. I didn't have enough ice cubes BUT, that didn't mean my boys didn't enjoy it. Probably all that sugar, hehe. I have done this many times successfully and they tell me its better than the corner store!


Saturday, May 10, 2014

Rainy diy, w/Free Printable

Yesterday was rainy. ALL day. But, I am not complaining! It is a welcomed change from the snow we got last weekend, yes in May! Sometimes I wonder why we live in such a cold climate where we really only get to enjoy summer weather for 3-4 months of the year.
Anyways, I decided to get my decorating and DIY'ing on since it's been awhile and came up with some cute chalkboard prints for my kitchen!
And since Im so awesome, I am going to link the download for them for FREE below. Your welcome. Feel free to share the love ;)


I created these using photoshop in an 8x10 size. (Standard US Paper size, aka, you can use regular printer paper OR photo paper from the dollar store!)
I just used some picture frames I had bought a long time ago and never used from the Dollarama store for $1.25 and painted them with black acrylic paint. I suggest using something a bit bigger than these though as I had to trim them up quite a bit, and even though I created a white matte border around them, after I cut them to fit inside the frames, the matte  border didn't show. So I ended up cutting a paper border with just regular printer paper. Nothing fancy over here peeps! And if you look closely at the top picture, the border I made cut off the text :(
Just use a bigger frame and save yourself the trouble!

Text was cut off in top picture!

The first one is because, well, it made me smile. The second one I created because I am forever trying to figure out conversions in the kitchen and I run around like a made women from the computer to the kitchen to figure them out!
So to grab these two printable's you can go HERE and HERE!
And if you used them, I would LOVE to see photos in your lovely homes! AND make sure to share them with your friends!
Sharing is caring! (At least thats how the saying goes ;)
HAPPY SATURDAY!

Saturday, May 3, 2014

I'm Still Alive!

Life has been busy. Scratch that. Life has been insanely ridiculous stupid busy! :/
I have been hard at work (outside of the home) and hard at work re-opening my ETSY shop and trying to keep up with my motherly/wifey duties!
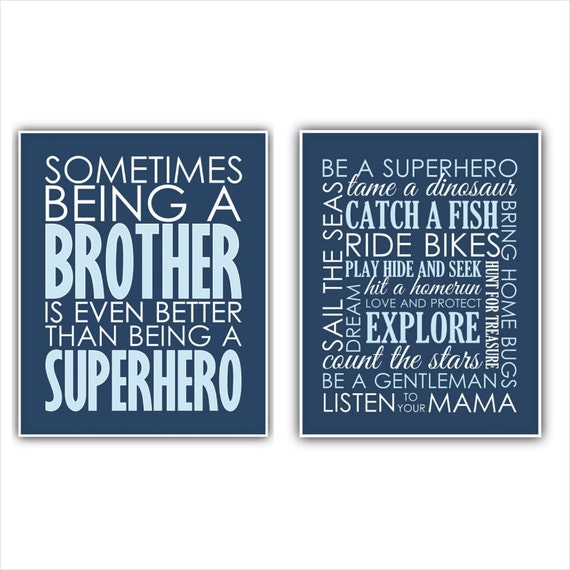
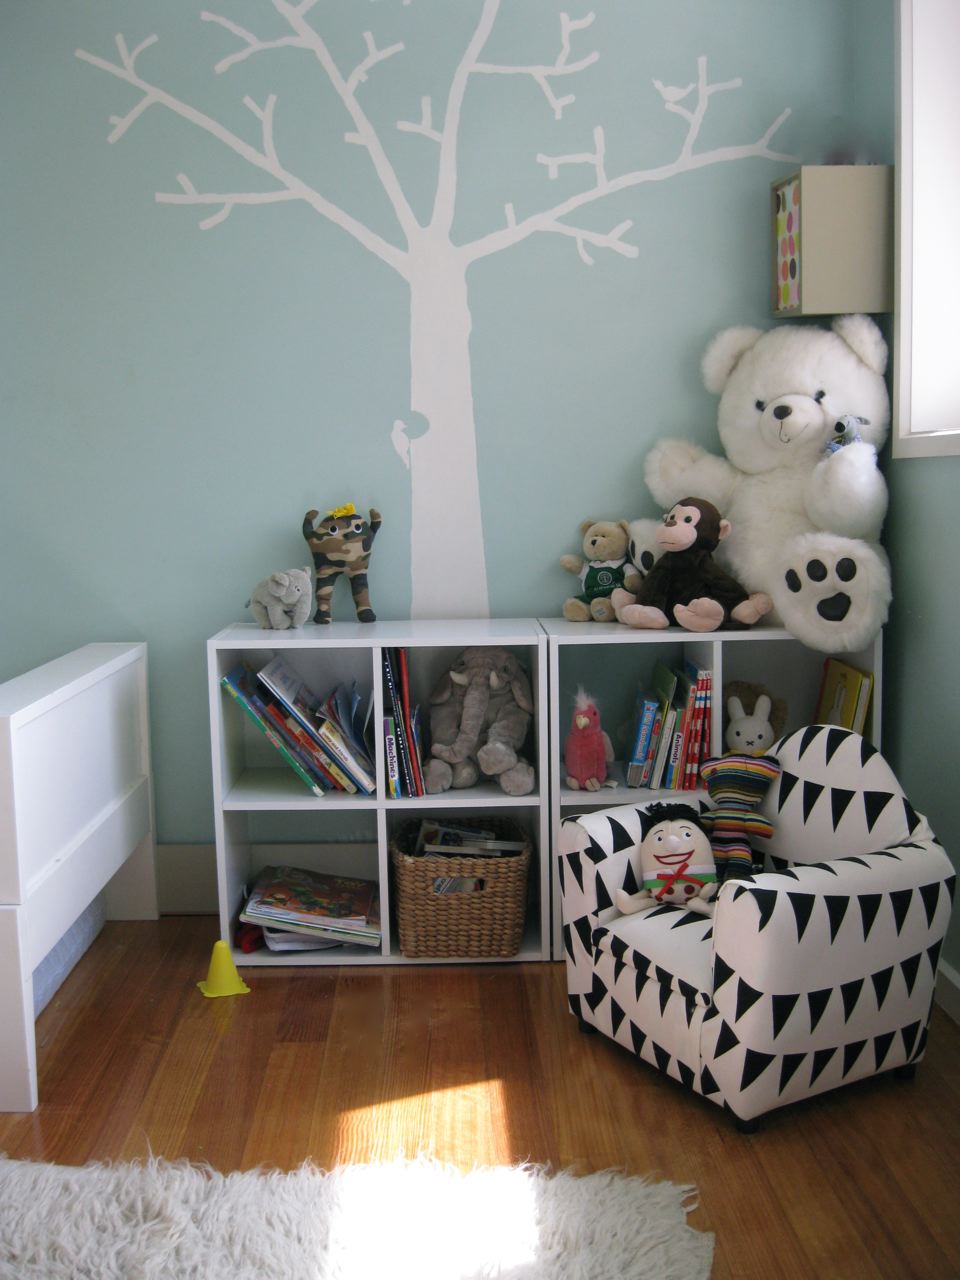
So today's post is simple. All my favourite looks, locked into one post and the vision I have for the twins bedroom! A little boys room DIY have you. I have never had a chance to decorate, paint or even think about creating fun spaces, so I am super excited to start decorating!
Here are my favourites for a little inspiration;


Love these side shelfs for storage & the colours!

Planning on some digital art.

I have a similar children's chair in velvet red, upholstery job?

LOVE these! Maybe silver instead of yellow.


Does anyone else spend hours online looking for design ideas or am I the only one?! When I am done I plan to post a reveal. Hopefully soon! For now, I will stick with collecting ideas! :)


Tuesday, February 25, 2014

Youtube Vlogging's

I have been seriously lacking in the posting department, sorry guys! Life gets in the way. And when I say life, I actually mean work... :/ On the bright side, I have been able to somewhat keep up with our new fun family venture, vlogging! Make sure to check out our channel and subscribe if you want to keep up with our busy family and show us some love. Happy Tuesday :)


Friday, January 24, 2014

Wood Growth Chart DIY

Life has been crazy. Ok, understatement of the year. Incredibly insane busy! I never stop moving, someone always needs me to do something, and I'm exhausted pretty much all the time. Which, come to think of it, is probably why I've been sick for over a week...
Moving on! Thought I would share this quick DIY for those of you who are parents to some little ones and want to track their growth along with some memories!
We just purchased our new home, and with it came a wall full of the previous owners little markings of their children's growth. We're talking 12+ years of it! So when I seen one of these floating around the internet and places like ETSY for a pretty dime, I thought I would give a shot at it myself. I am in love. Seriously in love! I am upset that I didn't create it sooner but what can ya do.
Alright, so here is what I bought and a price break down; (Canadian prices of course!)

- Wood Fence Post. $2.97
Pretty sure it was cedar, also 7ft long and just under 5 1/2 inches in width. I went with something VERY light so if it did happen to come off the wall it wouldn't hurt anyone!
- Minwax Stain OR other. $0 OR about $8 if you have to purchase it. 
 I had some of this left over so I didn't need to purchase, but I got mine at walmart!
- Acylic Paint. $0 OR $1 if you have to purchase it.
I also have a ton of this in my stash!
- Sawtooth Hook  $0 also had OR $1 at dollar store.
- Very Fine paint brush $0 also had.
- Fine grit sandpaper $0. also had.
- Measuring Tape. $0 also had.
To make sure you get all the measurements right!
- Pencil $0 also had.
Not necessary, but came in super helpful when marking where the measurements needed to go!
- Scissors

The first thing I did was sand down any raw edges to make sure I wouldn't get any splinters! After I was done, I gave it a quick wipe and applied the stain. At this point, I think I spent all of 5 minutes. seriously. I thought to myself, how awesome is the project I'm almost already done! Not quite.... oh was I wrong.

I gave it about an hour to dry. It was still a little wet but I was impatient. I made my first mark on the bottom for 1ft. Keep in mind that you will be hanging this on the wall, so I accounted for that by adding 6 inches to the bottom of the board. I then marked out every foot with my pencil!

I took out my smallest art brush, were talking super small! It will get frustrating with something bigger, just trust me, you can't go to small! ;) Then I painted a longer, thicker line on all the markings I made for the feet!

Then I measured and used my pencil again, this time for the inches. Then I took my paint brush again, and painted all those lines once again, this time making them less thick, and less in width. Basically you want to mimic the lines on the measuring tape as far as lengths go.

Then I decided on the font I would like to use for the numbers, and printed them out on some cardboard using my printer. A cereal box would work nice for this. I then just cut out the shapes and used it as a template. First, I traced in pencil, then I went over it with the paint!

I then added the sawtooth hook onto the back. To hand it on the wall, I used toothpaste. Yes, you heard me right toothpaste. I put some on the back of the hook so when I placed it on the wall, I knew exactly where to place the nails. Paint would serve this same purpose though!

Remember the 6 inches I accounted for when I painted my lines? I measured 6 inches up from the bottom of my floor and marked it on the wall. Then I just lined up the bottom of my growth chart, pushed it against the wall and then I knew where to place the nails! After the nails were in, I could hang it on my wall, stand back, and admire it!

And now I am in LOVE with it! It was very simple to make, took me one night to create it and I had most everything on hand so it cost me a total of $3! A pretty good deal if you ask me, considering some of the nicer ones go for as much as $65 on ETSY! What do you think?


And if you haven't had a chance to see it yet, we posted a new video how to make gluten free, 2 ingredient playdough! Check it out and make sure to subscribe so you can see all our new videos. Hope you have a rad weekend!


Wednesday, January 1, 2014

New Year, New Family

2013 for our family was a big year. We had many firsts, and many opportunities to trust God. I some how always seem to think that nothing changes with us, until I actually sit down and think about all God has done in our short life together as a family. We are beyond blessed, we are healthy, rich in love and family, and growing each on our own, massively.  For myself, 2013 was a year of trust, of learning how to her my Fathers voice and let Him control areas of my life that I have a hard time with period. For my husband, he has grown so much as a father, husband, and a business leader in the community. He still doesn't see it, but God has blessed him with a real talent and purpose and I love to see how much he has grown! For my boys, well they just grew bigger in size and they are we all are learning how to function as a family with obedience, words, and controlling ourselves. So here are the 5 things that topped our list for 2013!

5.) In March, we were down to 1 vehicle and desperately needed a second as I took on more work outside of the home and needed to get where I needed to go. We had a short budget and have always agreed that we don't ever want to go into debt if avoidable. God blessed us with a 2003 GMC Envoy for 1/5th of the market value which has proved to be a huge blessing as a reliable vehicle! See, God is good.

4.) This summer the boys and are were blessed enough to go visit Joel's family in the states. We hadn't been back for over 2 years, and I am grateful that his family was able to see them, specially the ones that may not ever get a chance again. We spent a couple of days on the Oregon coast, where my husband grew up, and it was a blessing to watch them play where he played.

3.) In August, I felt like God was telling me to let go of some things. I had too much on my plate, so I let my ETSY shop go. It was extremely hard for me because at the time, I was making enough that I was finally seeing a dent in some of our debt, BUT, I was stressed. I had too many people who didn't understand that even though I ran an ETSY shop, I had two other jobs, plus being a mom and running a household and expected me to delivery yesterday. It ended up burning me out trying to keep up, so I closed shop and prayed God would provide! After all, He told me to stop.

2.) A month after closing my shop, God answered our prayers. I had an offer to help with a new company which had me on a flight to China in less than a week! Not only did he answer my prayer, I also jumped on a plane to fly half way across the world, by, my, self. Anyone who knows me, knows this is crazy! I don't like going to the grocery store by myself. God grew me those 2 weeks... God is good!

1.) #2 is why #1 happened. We were blessed with the purchase of our forever home! Owning a home was only ever a dream, but God provided, again! We both felt like God was telling us to just let go, get out of the way, and let God do His thing. When we listened, He did just that.

So that brings us to New Years Eve. We are sitting in our beautiful home, (under all the dust from reno's,) and enjoy the blessings that God has given us. I constantly have to remind myself that we are blessed, sometimes I forget and let the stress' of life pile up on me. I think that is what this new year is going to bring for me. I need to let go of things that I don't need attached to me, and just live the life God has for me. Let Him take control of the worries and stresses and learn to say no sometimes!
As for my family, I think first on the list is more family time. More getting outside, getting active, and getting into the word as a family! New year, new challenges, and definitely more fun :)
Happy New Years!


Enter to win a free digital print from my new shop, 29:11 Studio. Not only can you win some fab art for your own home, but you can help support me! Just by entering and sharing with your friends and family, it's that easy! :)

a Rafflecopter giveaway

Monday, December 23, 2013

IKEA Kura Bunk Bed Hack

I have been dreaming about hacking this bed since I got it over 3 years ago for my twins. After we purchased our home, I knew it was time! The bed was pulled apart from the move, are our basement is empty and unfinished. Exactly what I needed! So I browsed the internet and got to work. I used the tutorial over here. First I painted out all the pine as well as the ugly blue panels. (did you know IKEA now sells this bed with white panels and it comes mostly put together? Grrr.) Anyways, this process took me about a week. Mostly because I had to work and could only work on this during the evenings.
I used primer first, and used this stuff, Zinsser because thats what the tutorial told me to do. So I listened.


After I painted everything white with the primer, I used a paint sample from Behr to paint one of the side panels and the chevron. I used a tutorial here to figure out how to get the perfect chevron stripes! I just used masking tape for this because I had no painting tape on hand. It worked out okay!


Here is the before and after! Two beds in one room basically took up the entire space. Now they have plenty of room to play and sleep. My husband wants to build a platform under the bed with some drawers to add more storage for their toys, we have yet to draw up the plans for that but hopefully that will happen soon!


The only thing I regret, is that I didn't use a sealer on it before we put it together because we were really wanting to just get the bed together so the boys had room to play in their room! I do plan on sealing it though, because if it gets banged a little it peels off too easily. DO NOT SKIP THIS STEP! There is a reason she told me to use that in the tutorial... I still have a ton of work to do in their room before its complete, but I think this was the biggest task! So glad it's done :)

Friday, December 20, 2013

First Home Project!

Before we decided to purchase our home, I knew that if we did, that the front entrance would be the first thing that had to be changed! I don't mean "had to" as in, it was ugly and I couldn't stand it, or that I just wanted it changed so dang bad. The previous owners had changed out the carpet to laminate, but in the process, a chunk of the flooring where the carpeting had been, was missing. It was just plywood. It was driving me insane, AND I didn't like the idea of having the plywood bare right where all our wet winter boots were going to pile up. So my wonderful husband, let me pick out some flooring and I got my Christmas present a bit early! Yay!

See the bare subfloor? Yea, not my favourite thing!
Our local hardware store had some very nice slate on sale. ($1.99sf to be exact.) At first I hated the thought of the little textures and having to clean it all out. Then, I looked at the other options which were all much more expensive than this slate. They also looked fake. Like they were digitally printed onto the ceramic. BLEH! So slate it was! And I have to say, I am in love with it. The colours and texture are amazing and totally our style!
It cost a total of $200, and we were blessed with a family friend who knows how to install this stuff properly and helped us out. (Thank you, thank you, THANK YOU! ;)
Doing the reno's in our home properly and not looking like a DIY disaster is incredibly important to us. After living in rentals where the landlords could care less, and everything was falling apart, we are ready to do things right and take care of them. No matter the work!

So that is our first project. Not huge, but big enough. And definitely adds more beauty to our forever home! What do you think? What kind of flooring have you dreamt of adding to your home?


Tuesday, December 17, 2013

the BEST Salt Dough Recipe!

Ok, so maybe not the best, but it was the best for me! Whenever I try to create some salt dough ornaments, which is pretty much every Christmas, it breaks and crumbles.  I was on a mission to figure out how to make my ornaments as awesome as my aunts. So I asked her, what was her trick? She literally has been making these since before I was born. Point in case; amazing salt dough ornament created by my aunt.

My aunt is obviously rocks at creating salt dough ornaments!
She told me the trick is to get the right consistency.  There is no secret ingredient, just have to practice playing with the flour, water ratio until you get something soft and pliable enough to mould into shapes without melting apart but not be so crumbly, as that will just create big cracks. So today I attempted my second batch of salt dough this year, and I think I got it just right! This is what I used;

- 1 cup flour (Robin Hood Brand)
- 1/2 salt
- 1/2 cold water

Once you have finished creating your ornaments, place them on a baking sheet at the lowest temperature you can for 3-6 hours.

I must be crazy, because I choose to make a special ornament to go with each of my niece's and nephew's Christmas gifts as well as my boys. That is 6 is total. When you are out to make ornate decorations and not just flat easy ones, it takes some time, but it was totally worth it!

And last week, I attempted to create a nativity set with salt dough. It turned out much more crumbly, but I like it! :) I still have to do the painting of it, but for a $0 budget, I think I did pretty good.

Have you ever made salt dough ornaments? I love making them as personal little touches, and they make a Christmas tree look that much more beautiful with some real love on it!

Fresh out of the oven, no paint!

Sunday, December 8, 2013

Peace. Not on earth, but in a mommy's SUV!

It is Sunday night. I am sitting here taking a quick break from painting my boys bunk bed. (Also known as an IKEA hack, hopefully post to come soon!) My boys decided that they wanted to sleep over at my parents place, so I took advantage of this free time to try and finish their bed so that I can get their mattresses up off the floor and give them some play space back! Why again do I do this to myself? I have to work in the morning. But, this bed MUST get finished! Okay, so if it doesn't get finished I promise I will let this one slide and finish it later... I am still learning the letting go part.

This morning, I doubted getting out of bed to go to church.
- First, we have had -35 weather. Need I say more?
- Second, I have been working 5 days a week doing Christmas concerts at my daycares so I really wanted to just hermit myself all weekend.
- Third, I got a phone call early this morning from my pastor letting me know that a main water pipe had broken and church had to be re-directed to a very small space which would have been uber uncomfortable for our size of congregation. But, we did it. Well, we decided to go to my parents church instead, which had a later service so it worked out alright anyways. Plus, I am very sure that what God wanted me to hear, was there.
He talked about peace. Now this is something I have heard my whole life. In fact, if you google God's Peace, you will find many verses. But today, he talked about Philippians 4:6-7 Amplified Version;
" Do not fret or have any anxiety about anything, but in every circumstance and in everything, by prayer and petition (definite requests), with thanksgiving, continue to make your wants known to God. "

If you ask anyone close to me, they will all agree that I worry too much. Possibly anxiety, depends who you ask. I worry mostly about money, because, well without money you simply cannot survive! I worry that the bills will be paid, that we can afford to buy groceries after all is said and done, that the (now mortgage) is paid and that everything is covered. But today, God told me to stop! I am doing all I can. I am working as much as I can, no matter what I do, it is not in my control. I am doing exactly what He has asked me to do. I cannot make more money come in, and God has always provided with what we have. So why do I worry? In fact, God has blessed me with SO much more than I deserve. He provided the biggest blessing of all time, the chance to purchase our first home! Every time I think about that I am just in awe. Still, two weeks later. Our God is SO good! So why do I worry?! Ok, so point of the post is this; I am done worrying. God is in control. And if I can just remember to let it go, including my anxiety about bills, I will truly be able to rest in His peace. I am deciding to not let the little things set me off! Dear Lord, please help me! I have two 4 year olds, I need all the help I can get.

Anyways, the whole point of this post was to tell you how awesome God is. Really, I don't have to tell you how awesome He is. He just is!
As we were driving home, my little Ez started to have a meltdown. You know the kind where they are extremely tired, but wont give in? Where every little thing is setting him off? He even told his brother to stop looking at him as he sobbed and screamed. So after about 10 minutes of this, I reached over to my husbands hand, grabbed it and prayed the most simple prayer I think I may have ever spoken, "Dear Lord, I love my son, thank you for such a wonderful, beautiful and amazing little boy... I am asking you to fill him with your peace, in the name of Jesus, amen."
Usually I get frustrated. Sometimes I yell. Sometimes I start crying. But today I spoke peace into my son, and the very minute I ended my prayer, he stopped whining. Literally! from full fledged tears and screams to silence. I looked over at my husband and started laughing, did that really just happen? We were both laughing, kind of in shock. You know, we ask God for things, we speak things and we don't really expect them to happen. I really do believe that our words hold more power than we think.

God is good. He does listen, even if it is just a little thing setting a mom off. Learning to rest in God's peace. It is something new for me, but I am excited to let Him take over my worries and enjoy life, because these are the cuties I am privileged to have in my life and be mommy to. And to be honest, I just don't have time to worry or be upset over the little things! :)

Helping us out at Home Depot. The DIY'ing adventures begins!

Friday, November 29, 2013

Banana Macadamia Chip, Oatmeal

I used to hate oatmeal as a kid. I remember trying it over and over again in hopes that my taste buds would eventually like it, but nope, I would just gag! It made me gag people!!!o no wonder I hated it so much.
As an adult, I still have problems with eating oatmeal at times, but I love the different creations that makes oatmeal so delish that I just can't help myself.

This morning I awoke to 5 VERY ripe banana's sitting on my counter and I knew I had to use them up quickly. I have a bajillion and one things to do around this house with half unpacked boxes everywhere, but wasting food is just not worth it! haha. So I whipped up some clean banana macadamia nut cookies (Gluten free of course), and some oatmeal for breaky.

Ingredients;
GF Oatmeal
Macadamia Nut Chips
Vanilla Almond Milk
Brown Sugar (or your sweetener of choice. Agave, Splenda, ect.)
1 Banana


Cook your oatmeal however you prefer. Then add your milk, macadamia chips, sweetener and banana. Make sure to add your chips while it's still warm so you get gooey yummy goodness all over your bowl! Then enjoy :)
So far this is one of my favorite ways to eat my oatmeal!

What is your favorite way to eat oatmeal in the morning?

Friday, November 22, 2013

Momma Talk Blog Hop

Hey ladies! This weekend is a big one for me so I'm cheating and posting this a little early! An hour to be exact, but whose counting? Anyways, Hope ya'll have a beautiful weekend, I'll be busy living my dream! Literally, blog post to come. promise! Make sure to link up and meet some new friends!
And if you are interested in co-hosting the next momma talk blog hop send me and email; rock-a-boo@hotmail.com. I will hook you up yo!


1. Sweats or yoga pants?
I kind of went through a yoga pant stage, but I'm really enjoying comfy sweats these days!

2. favourite place to eat?
I LOVE edo. Mostly because I don't have to cook :/ Little fun tidbit, I actually hate cooking but force myself to find the joy in it because I have to cook for my family!


3. If you could have any super power, at all, what would it be?
Ok, so this has never changed since I was a kid; being able to snap my fingers and have any food I wanted cooked and in front of me ready to eat! No limit, just think and snap!


4. hot or cold?
When I was a kid, cold. I loved curling up next to my cold wall and pillow and snuggling in. Now I prefer to be hot! I completely chose the wrong country to live in solely based on that, lol.


5. What do you wish you could do, but just can't?
I wish I had the ability to pick out an outfit from my closet and rock it! I see all these beautifully put together outfits on Pinterest,I attempt it and fail miserably. I think I might always just be that "hockey girl" with comfy pants and hoodies!!! :/


rules;
• Copy, paste and answer the questions in a blog post.
• Grab the button below and add to your post or sidebar.
• link up below! Make sure to visit some new friends, and you can even follow me via blogLovin or Google Friend Connect on my sidebar. :)

Image and video hosting by TinyPic


Wednesday, November 20, 2013

Wordless Wednesday

I took some photos for my sister and her family! That was my Christmas gift to them :)


New haircuts for the twins.

 
LOTS of new recipes and cooking.
 
Like this yummy salmon salad I made HERE

How was your week? Make sure to swing by on saturday for the Momma Talk Blog Hop! ;)
Happy hump day peeps!

Monday, November 18, 2013

15 Minute Lunch

I am very blessed that I am able to come home during lunch on the days that I work, to whip up something healthy to eat. I came home today to an empty house, (my husband works from home but he was out at a meeting,) so I raided our fridge and found what I could to make myself something quick and for one! Unfortunately, moving in less than a week also means very little groceries as I don't really want to fill our fridge until we get into the new place! This is what I found;

Mixed Salad Greens
Eggs
Green Onion
Cheese
Mushrooms
AND my favourite,
Salmon Burgers

I am in love with these salmon burgers that I discovered  at Costco. I used to hate Costco. I would go in, drop $100 and walk out with nothing to make a real meal! I have gotten a bit smarter on my trips, which include purchasing these yummy burgers. I think they are $14ish for a pack of 12. AND, they are gluten free!


There are many ways to cook these, I just pop these in a frying pan with a little olive oil and fry until nice and brown/crispy!

Yes, it's gluten free! ;)

Don't mind the lovely paper plates, just another perk of moving.


It was delicious, and the best part? It only took me 15 minutes to whip together and it was super healthy! Now to leave you with a shot I took of the cutest little red head ever, haha. Happy Monday!


Saturday, November 16, 2013

Christmas Photo Card Overlay's

It happened. We got dumped with snow overnight and there is no hope for a warm day in sight! I am little nervous as we are moving in exactly 1 week from today. None the less, we are making the most of the cold weather and staying nice and warm cuddled up in our jammies! I also took the time to make some pretty awesome Christmas Card overlay's for those of you who use photoshop and to help myself get in the Christmas mood. If you don't use photoshop, I am sorry, but it's what I use so thats what I created it in!  :P
I was going to list these in my ETSY shop but then decided I would offer it to my fabulous readers instead, and if you feel the need to donate towards my time, (which is SUPER appretiated!) you can do so by using paypal and using the button below;


You can download the psd. files from here! Text is editable as well as text colour. Only requirement is that you use this for personal use only! DO NOT re-sell digital files, products made from files, or use for clients if you are photographer! All my work is copyrighted to me. If you are photographer and would like to use for your clients, PLEASE email me and we can work something out! Thank you for respecting me and I hope you enjoy creating some awesome Christmas photo cards for your friends and family!
OH, and stay warm peeps! ;)

Monday, November 11, 2013

Super simple "Sweet 16" diy

She is 16. The beautiful little young women who I held at birth, helped care for, feed, bathe and taught is turning 16! Now if that doesn't make a person feel old, I don't know what would. This year I promised I would do 1 thing for her for her birthday; Set up a photo booth for her and her girlfriends.
This doesn't seem like a lot to ask, but for me, 4 hours of my time is precious! We have less than 2 weeks till we move, I'm working two jobs, and I'm over committed everywhere else. (And don't even get me started on my motherly house duties!) But none the less, I did it because I love the poop out of her!


I wasn't entirely sure what else to get her for her birthday, but I remembered seeing these really cute centre pieces that were overloaded with things that were specific for that person. I then thought about putting together something similar, but use the "vase" as a make-up brush holder" for future use! No wasting over here, we multi-use. So I headed to my nearest Dollarama and stocked up. I knew the idea I was going for, but wasn't sure what to add so I just went up and down the isles and whatever I thought would look good, I grabbed. My budget was $10. I spent just over $14. Here's what I got;


- Decorative glass container $2
- Craft vase filler $2
- Strawberry mil straws $1
- Perfume/Lotion pack $1.25
- Cheetah and Leopard underwear $1.50 each
- Make-up brush's $1.50 each
- Gift Bag $1
- Tissue paper $1
- Chocolate (boys gift from their halloween stock!)


I simply put the vase filler in the glass container and started adding things by sticking them into the vase. I then took the underwear and wrapped into the shape of a rose, and used tape to hold it together. I used the strawberry milk straws as a "stem" and stuck them into the vase with all the other goodies!


For the tissue flowers, I used youtube to figure out how to cut them, SUPER easy! Took me 5 minutes, and I used this video. I just taped them onto the ends of some more milk straws like the underwear.
Then I googled "Birthday Printable's" and found the little banner I used for the "Happy Birthday Tatum" part. I found the ones I used here. I did use photoshop to make them bigger and edit them to have her name on them.
That was it. Took me very little time to whip together, very affordable, and she loved it!


Have you ever had success with a dollar store gift that wasn't cheesy or cheap looking?


Saturday, November 9, 2013

Momma Talk Blog Hop

It has been a few weeks since I have attempted another blog hop, so here I am! Ready to go. Sort of.
Thanks to life, work, starting a new job, demanding preschoolers, buying our first house/moving (eeek!) and all that other good stuff we call life. You could say I am busy. Or crazy. Let's go with busy... Hope your weekend is an enjoyable one momma's!


1. Lake or Ocean?
Lake. No sharks in our lakes up north!

2. If you were another person, would you be friends with you?
Of course!


3. Do you believe in UFO's?
No. I am however, am intrigued by it!


4. Favorite, must-have makeup piece?
Okay so I can't just choose 1! If I had to go with the basics, BB cream, bronzer, blush and mascara!


5. What is the weirdest thing you've ever eaten?
Well I ate a fish that was looking at me (dead but still looking at me) in China, but it wasn't that weird other than the way it was presented. In Florida I ate alligator, does that count?


Copy the questions, answer, grab the button, link up, and join by posting on your own blog! Make sure to visit some new friends, follow me via blogLovin or Google Friend Connect on my sidebar. :)

Image and video hosting by TinyPic


Wednesday, November 6, 2013

Wordless Wednesday.

We dressed up, including me!
Did trick-or-Treating at the mall for the first time, AND decorated baby pumpkins!
We carved Spider-Man & Angry Birds into pumpkins, then went trick-or-treating around the neighborhood.


With friends :)
We did more learning.

Then writing what we learned.

And mommy fixed the crud out of this door! Yay for moving! :/ not.


 So that was pretty much my week. Always busy and never dull! Today I am linking up somewhere new, here; http://www.thejennyevolution.com/october-instagram-wordless-wednesday/
Join me?


SshWWButton